Upload a dataset
This section provides instructions on how to upload data to CryoCloud - either via our web-application or AWS transfer to S3.
For most datasets, we recommend AWS transfer to S3 and have simplified the process within the app.
To upload a dataset, you will first need to sign in to the app and navigate to the ‘Datasets’ tab on the left-hand panel Once in the datasets view…
- Click +Add new dataset
- Specify dataset name, type (e.g movies) and file format (e.g. Tiff or EER), and click Create dataset
- In the upload tab click +Generate credentials to generate unique S3 upload credentials for this dataset.
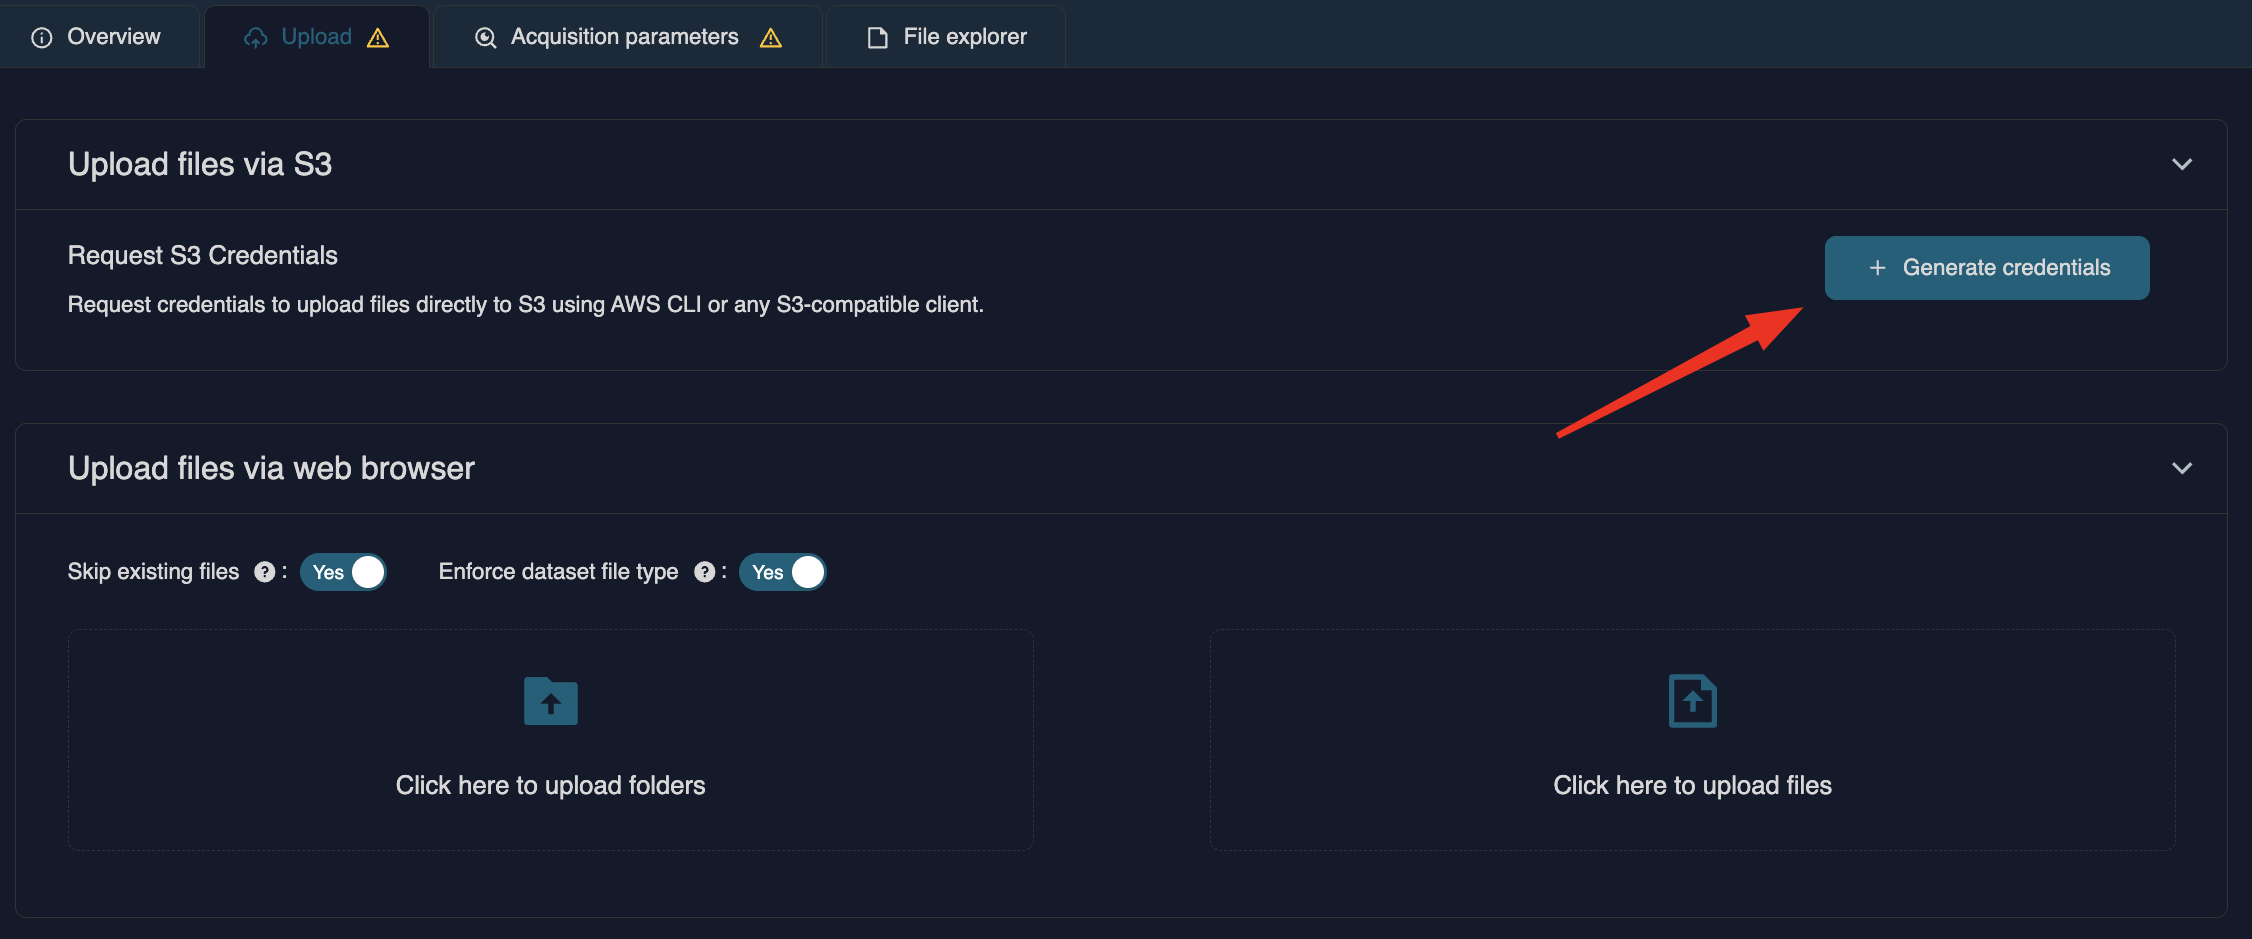
You will get an auto-generated email detailing these credentials and further instructions incl. a one-line command input for AWS-CLI that will sync your local dataset to the dataset’s S3 bucket
The upload can also be performed with 3rd party tools such as CloudBerry or Cyberduck
Please note, the access credentials are valid for 1 week. If they expire before initiating data transfer, you can repeat Step 3 above to generate a new set.
Populate the imaging parameters
You must fill out all of the imaging parameters for a dataset in order for it to be marked as complete. In Imaging mode, Super-resolution should only be specified for K3 data that was not binned at the microscope. Choosing Super-resolution here will set 2-fold binning of micrographs as the default during motion correction - This can be edited manually if desired.
Linking a gain reference to the dataset:
If you uploaded a gain reference for the dataset, make sure to link it by selecting it in the gain reference field.
N.B. If you have a .mrc gain reference and a different dataset type (e.g. .tiff dataset format), untoggle "Check file type" to upload it and link it. Linked gain references will automatically be pre-filled if you set up a motioncor job for the dataset.
Operations for gain rotation and flipping can be specified here. If you are unsure, please contact us and we can check whether modification of the gain reference is required. Automation of this process is coming to the app soon!
Dataset Upload via web application:
We recommend file uploads via the web application for individual files and small datasets up to 2 TB. Click on the Dataset tab on the left, and then +New dataset on the top right. Specify dataset name, dataset type (e.g. movies or aligned frames) and file format (.tif(f), .mrc)
Follow the same steps as for CC'Up to upload data, edit parameters or link gain references.
Snapshots keep track of your starfile versions, this is handy if you want to add more files or change some of the parameters later on, e.g. if you made a mistake.
Uploading particle stacks
CryoCloud provides the option to upload particle stacks and continue downstream analysis by running 2D classification, Initial model, 3D classification or 3D refinement jobs using the particles (Note: if you want to continue with 3D classification & 3D refinement, please make sure to upload the reference map to your project archive).
To do so, you will need to provide the following files:
- Extracted particle stacks in .mrcs format
- A metadata file of your particles (particles.star).
To upload the data, please follow the same instructions as provided above for movies and micrographs but make sure to link the particles.star after it is uploaded. In brief, follow the following steps:
- Create a new Dataset in the dataset view and specify as Type and as file format.
- Click and select your local folder which contains the particle stacks to start the upload.
- Select the corresponding particles.star file in your local directory and upload it.
- After the particles.star file is uploaded, link it to the dataset by selecting it from the dropdown at the bottom of the page and click .
The last step is critical and will create a particles.star file that you can use as input for jobs in your projects.